基于百度AI+Python编程的简单应用:关于人像照片动漫化的分析实现与批量化处理
本帖最后由 Hakutaku 于 2020-8-8 20:25 编辑 前两天刚写过一篇文章:
基于百度AI和Python编程的简单实现:通过QQ/Tim截图进行文本识别功能的分析实战详解
https://www.52pojie.cn/thread-1238347-1-1.html
(出处: 吾爱破解论坛)
由于这两天摸鱼时又一次使用到了百度AI,因此大家可以对比着这两篇文章进行学习。
# 前期准备
## 百度AI前期准备
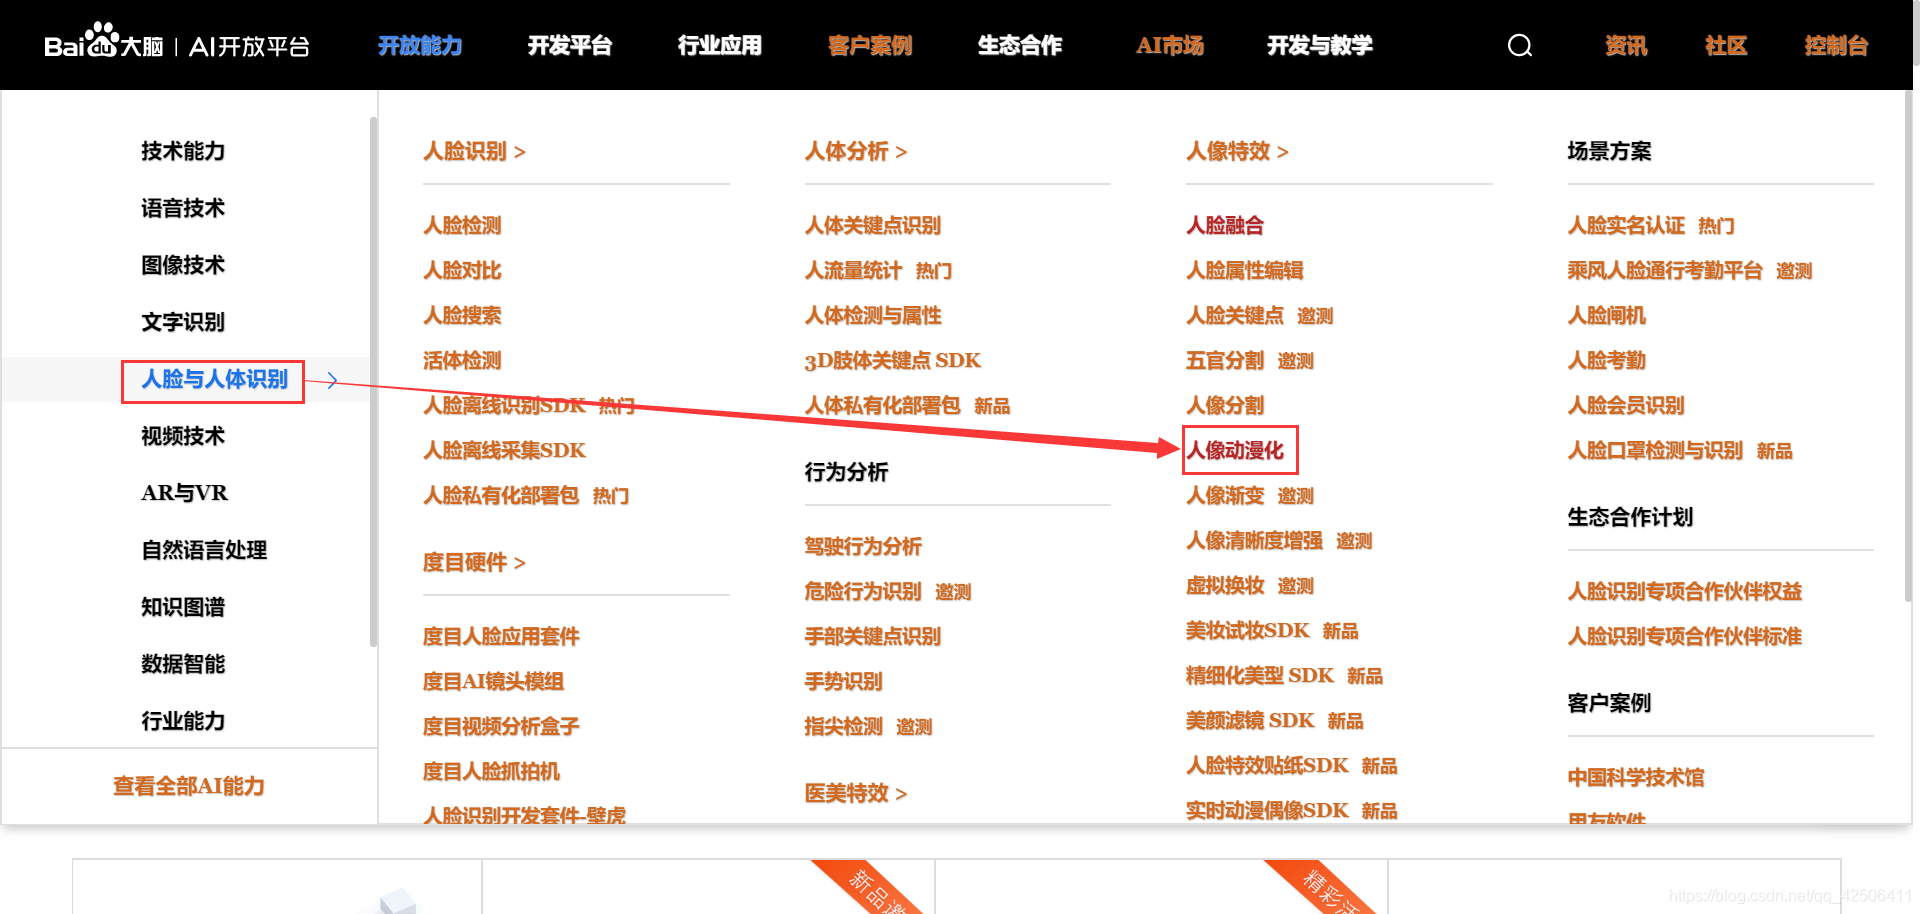
首先打开百度AI的官方网站( https://ai.baidu.com/ ),找到“人脸与人体识别”中的“人像动漫化”,点击进入人像动漫化。

老样子,我们进去“人像动漫化”页面后点击立即使用,可以进入百度智能云的登录界面,扫码登录。

点击“图像增强与特效”里面的“创建应用”。其中,应用名字和应用描述随意写、其他默认即可。

创建成功后,可以发现出现了“AppID”、“API Key”、“Secret Key”。这三项内容待会在Python编程用户鉴权时需要用到,必须提前申请好。
有了“AppID”、“API Key”、“Secret Key”后,我们点击左侧的“技术文档”。

与上篇文章不同的是,这次我们使用API文档而不是SDK文档。点击“API文档”,找到“图像特效”中的“人像动漫化”,打开后可以看到人像动漫化相关的接口说明。

下拉浏览接口说明,复制其中的请求代码示例中的Python代码内容,粘贴到Pycharm中作为主要代码基础模板。
```python
# encoding:utf-8
import requests
import base64
'''
人像动漫化
'''
request_url = "https://aip.baidubce.com/rest/2.0/image-process/v1/selfie_anime"
# 二进制方式打开图片文件
f = open('[本地文件]', 'rb')
img = base64.b64encode(f.read())
params = {"image":img}
access_token = '[调用鉴权接口获取的token]'
request_url = request_url + "?access_token=" + access_token
headers = {'content-type': 'application/x-www-form-urlencoded'}
response = requests.post(request_url, data=params, headers=headers)
if response:
print (response.json())
```

## 相关知识前期准备:API和SDK的含义及区别
**API**
应用程序编程接口,全称:Application Programming Interface。一般是指一些预先定义的函数,目的是提供应用程序与开发人员基于某软件或硬件得以访问一组例程的能力,而又无需访问源码,或理解内部工作机制的细节.
其实就是别人已经写好的可以实现特定功能的函数,而你只需要根据他提供好的接口,也就是调用他的方法,传入他规定的参数,然后这个函数就会帮你实现这些功能。
**SDK**
软件开发工具包,全称:Software Development Kit。一般都是一些软件工程师为特定的软件包、软件框架、硬件平台、操作系统等建立应用软件时的开发工具的集合。
其实就是指由第三方服务商提供的实现软件产品某项功能的工具包,相当于很多API和其他文件的集合体,可以用这个集合体完成某一个事情。
**SDK和API的区别和联系**
1.API是一个具体的函数、一个确定的功能,已经明确了它的作用(比如做加法)。
2.SDK就像是很多API方法的集合体、是一个工具包。比如需要做加法时,就调用计算机SDK的加法API;需要做减法时,就调用减法API;无论想要完成什么计算,SDK里总有能实现的方法。
3.SDK除了它提供的完善的接口,还会给你提供相关的开发环境;而API需要的环境必须得自己提供(比如传参)。
4.SDK相当于开发集成工具环境,API相当于数据接口。在SDK环境下调用API数据。(而这个SDK你可以自己配置或者下载第三方所提供的)
## 相关知识前期准备:鉴权
在百度AI前期准备的过程中,我们所复制的Python代码里面有一行很显眼的内容:
```python
access_token = '[调用鉴权接口获取的token]'
```
这时候,可能会有小问号有许多朋友了:鉴权?鉴权是什么?
鉴权(authentication)是指验证用户是否拥有访问系统的权利,涉及的领域主要是信息科学。
传统的鉴权是通过密码来验证的,但是由于密码经常会被忘记或者遗失,所以这种方式并不可靠。
为了克服这种鉴权方式的缺点,需要一个更加可靠的鉴权方式。目前的主流鉴权方式是利用认证授权来验证数字签名的正确与否。
**鉴权的类别**
鉴权主要包括两个方面:
① 用户鉴权,网络对用户进行鉴权,防止非法用户占用网络资源。
② 网络鉴权,用户对网络进行鉴权,防止用户接入了非法的网络,被骗取关键信息。
由于本次API文档主要牵扯到用户鉴权的内容,因此接下来关于鉴权的作用我们主要来说说用户鉴权。
**鉴权的作用**
使用鉴权可以用来识别出非法用户。用户鉴权,是对试图接入网络的用户进行鉴权,审核其是否有权访问网络。通过用户鉴权可以保护网络,防止非法盗用;同时通过拒绝假冒合法客户的“入侵”而保护该网络中的客户。
**Access Token鉴权的获取**
那么我们重新回到上述代码:
```python
access_token = '[调用鉴权接口获取的token]'
```
查看人像动漫化的说明文档,在请求说明中的url参数上可以看到关于access_token的参数的解释说明如下:
access_token:通过API Key和Secret Key获取的access_token,参考Access Token获取点击后即可打开“鉴权认证机制”的说明文档,观察“获取Access Token”的“请求URL数据格式”所提供的三个参数grant_type、client_id、client_secret。下拉说明文档,复制“获取access_token示例代码”中的Python代码,下拉粘贴到Pycharm中作为鉴权基础模板。
```python
# encoding:utf-8
import requests
# client_id 为官网获取的AK, client_secret 为官网获取的SK
host = 'https://aip.baidubce.com/oauth/2.0/token?grant_type=client_credentials&client_id=【官网获取的AK】&client_secret=【官网获取的SK】'
response = requests.get(host)
if response:
print(response.json())
```

# 实战分析
关于本次编码,我们共在pycharm中粘贴了两个模板:主要代码基础模板和鉴权基础模板。
## 代码改写:鉴权基础模板
我们主要的面临的问题便是鉴权问题,因为我们需要鉴权认证用户身份。因此,我们首先来处理我们所粘贴的鉴权(access_token示例代码)的相关代码。
在使用鉴权的过程中,根据鉴权认证机制的说明文档,我们可以发现:
获取Access Token的方式便是通过使用GET/POST向授权服务地址 https://aip.baidubce.com/oauth/2.0/token 发送请求,并在URL中带上以下参数:
grant_type: 必须参数,固定为client_credentials;
client_id: 必须参数,应用的API Key;
client_secret: 必须参数,应用的Secret Key;
在“获取access_token示例代码”中给出的Python代码实例是使用了requests库的get方法请求授权服务地址的,而鉴权认证机制的说明文档则是推荐使用post方法。因此,我们将复制到Pycharm中的鉴权基础模板的相关代码由get方法改写成post方法:
① 注释掉host组成的整体链接和if response的相关内容;
② 新增变量url,赋值为我们所需请求的授权服务地址: https://aip.baidubce.com/oauth/2.0/token;
③ 新增变量params,赋值请求url所需的三大参数:grant_type(固定值为client_credentials)、client_id(值为图像增强与特效创建应用时所给的API Key)、client_secret(值为图像增强与特效创建应用时所给的Secret Key);
④ 更改requests的get方法为post方法,按住ctrl进入函数post方法进行查看,发现所需参数还应传入一个params参数进行post请求;
⑤ 获取响应结果response后,输出响应内容response.text后观察到里面输出的多项键值对中存在着'access_token'键和值;
⑥ 通过eval()函数执行response.text表达式并返回表达式的值,然后在使用['access_token']取出'access_token'的值并返回,完成函数post_tonke的编写。
```python
def post_tonke():
# client_id 为官网获取的AK, client_secret 为官网获取的SK
# host = 'https://aip.baidubce.com/oauth/2.0/token?grant_type=client_credentials&client_id=【官网获取的AK】&client_secret=【官网获取的SK】'
url = 'https://aip.baidubce.com/oauth/2.0/token'
params = {
'grant_type': 'client_credentials',
'client_id': 'API Key值',
'client_secret': 'Secret Key值'
}
response = requests.post(url, params) # 按住ctrl可以进入函数post查看
# if response:
# print(response.json())
access_token = eval(response.text)['access_token']# eval()执行里面的表达式
return access_token # 将鉴权之后的值进行返回
```
## 代码改写:主要代码基础模板
通过请求代码示例,我们可以观察到给出的示例代码思路:
Ⅰ 通过二进制读取形式获取图片,然后对图片进行编码;
Ⅱ 通过requests库的post方法传递参数(equest_url, data=params, headers=headers);
Ⅲ 输出json格式的response响应内容。
那么,明确了主要代码基础模板的思路后,我们可以对代码进行改写完善:
① 注释掉原有的图片读取形式,改写为常用的图片读取形式:
```python
with open('[本地文件]', 'rb') as file:
img = base64.b64encode(file.read())# 编码图片
```
② 简化代码:根据下述代码,可以发现第三行request_url与access_token的字符串连接多此一举,而"?access_token=" + access_token完全可以通过传参params完成。
```python
params = {"image":img}
access_token = 'post_tonke()'
request_url = request_url + "?access_token=" + access_token
response = requests.post(request_url, data=params, headers=headers)
```
因此params可以合并上述代码第2行的access_token和第3行的requests_url为下述代码:
```python
params = {"image": img, "access_token": post_tonke()} # 通过表单提交形式提交access_token
```
③ 解码图片,保存动漫化后的人物照片。
在运行示例代码输出json格式的response响应内容后,我们观察到输出的键值对中'image'即为动漫化后的人物照片的键,因此我们需要取出'image'对应的值:
```python
with open('test.jpg', 'wb') as file:
animer = response.json()['image']
```
因为之前读取图片时通过base64的b64encode()方法进行了编码,因此同样我们使用base64的b64decode()方法进行解码:
```python
image = base64.b64decode(animer) # 解码
```
最后,将动漫化后的人物照片通过二进制写入的形式保存到所指定的目录中
```python
'''
人像动漫化
'''
request_url = "https://aip.baidubce.com/rest/2.0/image-process/v1/selfie_anime"
# # 二进制方式打开图片文件
# f = open('[本地文件]', 'rb')
# img = base64.b64encode(f.read()) # 编码图片
with open('[本地文件]', 'rb') as file:
img = base64.b64encode(file.read())# 编码图片
params = {"image": img, "access_token": post_tonke()} # 通过表单提交形式提交access_token
# params = {"image":img} # 把图片以键值对的形式传过去, params里面是些参数
# access_token = post_tonke() # 鉴权
# request_url = request_url + "?access_token=" + access_token
headers = {'content-type': 'application/x-www-form-urlencoded'}
response = requests.post(request_url, data=params, headers=headers)
if response:
# print (response.json())
with open('test.jpg', 'wb') as file:
animer = response.json()['image']
image = base64.b64decode(animer) # 解码
file.write(image)
```
# 代码展示
## 整体代码
```python
# encoding:utf-8
import requests
import base64
def post_tonke():
url = 'https://aip.baidubce.com/oauth/2.0/token'
params = {
'grant_type': 'client_credentials',
'client_id': 'API Key值',
'client_secret': 'Secret Key值'
}
response = requests.post(url, params) # 按住ctrl可以进入函数post查看
access_token = eval(response.text)['access_token']# eval()执行里面的表达式
return access_token # 将鉴权之后的值进行返回
'''
人像动漫化
'''
request_url = "https://aip.baidubce.com/rest/2.0/image-process/v1/selfie_anime"
with open('./image/test.jpg', 'rb') as file: # 读取图片
img = base64.b64encode(file.read())# 编码图片
params = {"image": img, # 通过表单提交形式提交access_token
"access_token": post_tonke()}
headers = {'content-type': 'application/x-www-form-urlencoded'}
response = requests.post(request_url, data=params, headers=headers)
if response:
with open('./output/animer.jpg', 'wb') as file: # 保存图片
animer = response.json()['image']
image = base64.b64decode(animer) # 解码
file.write(image)
```
## 批量化处理
关于将上述代码改写为批量化处理人像动漫化,只需要加入一个照片路径列表和一个for循环,同时将读取和写入的图片名称更改为变量,即可实现:
```python
images = ['01.jpg', '02.jpeg', '03.png'] # 批量化处理
for images_name in images: # 依次遍历单个
with open('./img/%s'%images_name, 'rb') as file:
if response:
with open('./imgNew/0%s'%images_name, 'wb') as file:
```
**整体代码**
```python
# encoding:utf-8
import requests
import base64
def post_tonke():
url = 'https://aip.baidubce.com/oauth/2.0/token'
params = {
'grant_type': 'client_credentials',
'client_id': 'API Key值',
'client_secret': 'Secret Key值'
}
response = requests.post(url, params) # 按住ctrl可以进入函数post查看
access_token = eval(response.text)['access_token']# eval()执行里面的表达式
return access_token # 将鉴权之后的值进行返回
'''
人像动漫化批量化处理
'''
images = ['01.jpg', '02.jpeg', '03.png'] # 批量化处理
for images_name in images: # 依次遍历单个
request_url = "https://aip.baidubce.com/rest/2.0/image-process/v1/selfie_anime"
with open('./img/%s'%images_name, 'rb') as file:
img = base64.b64encode(file.read())# 编码图片
params = {"image": img, # 通过表单提交形式提交access_token
"access_token": post_tonke()}
headers = {'content-type': 'application/x-www-form-urlencoded'}
response = requests.post(request_url, data=params, headers=headers)
if response:
with open('./imgNew/0%s'%images_name, 'wb') as file:
animer = response.json()['image']
image = base64.b64decode(animer) # 解码 -> 用什么编码方式就用什么解码方式
file.write(image)
```
# 效果展示
## 原图

## 动漫化
 为什么没有返回图片Traceback (most recent call last):
File "C:/Users/1/PycharmProjects/untitled2/测试黑白图像修复.py", line 59, in <module>
image_process(img_before, img_after, 'inpainting')
File "C:/Users/1/PycharmProjects/untitled2/测试黑白图像修复.py", line 49, in image_process
after_img = res['image']
KeyError: 'image'请教一下谢谢 QingYi. 发表于 2021-7-19 14:18
with open('./image/test.jpg', 'rb') as file: #
在这一步之前可以先判断一下文件是否存在,不存在 ...
哈哈哈,谢谢,学会了!确保程序的稳定性! 学习到了,谢谢楼主 学习了,谢谢楼主 这个好厉害 学习学习 总算找到有一个像模像样的例子了,棒啊 请教一下如何读取图片啊,谢谢告知 尝试一下 不知道收费不 看完还是懵逼 好东西 明天睡醒起来研究一下
页:
[1]
2