前言:
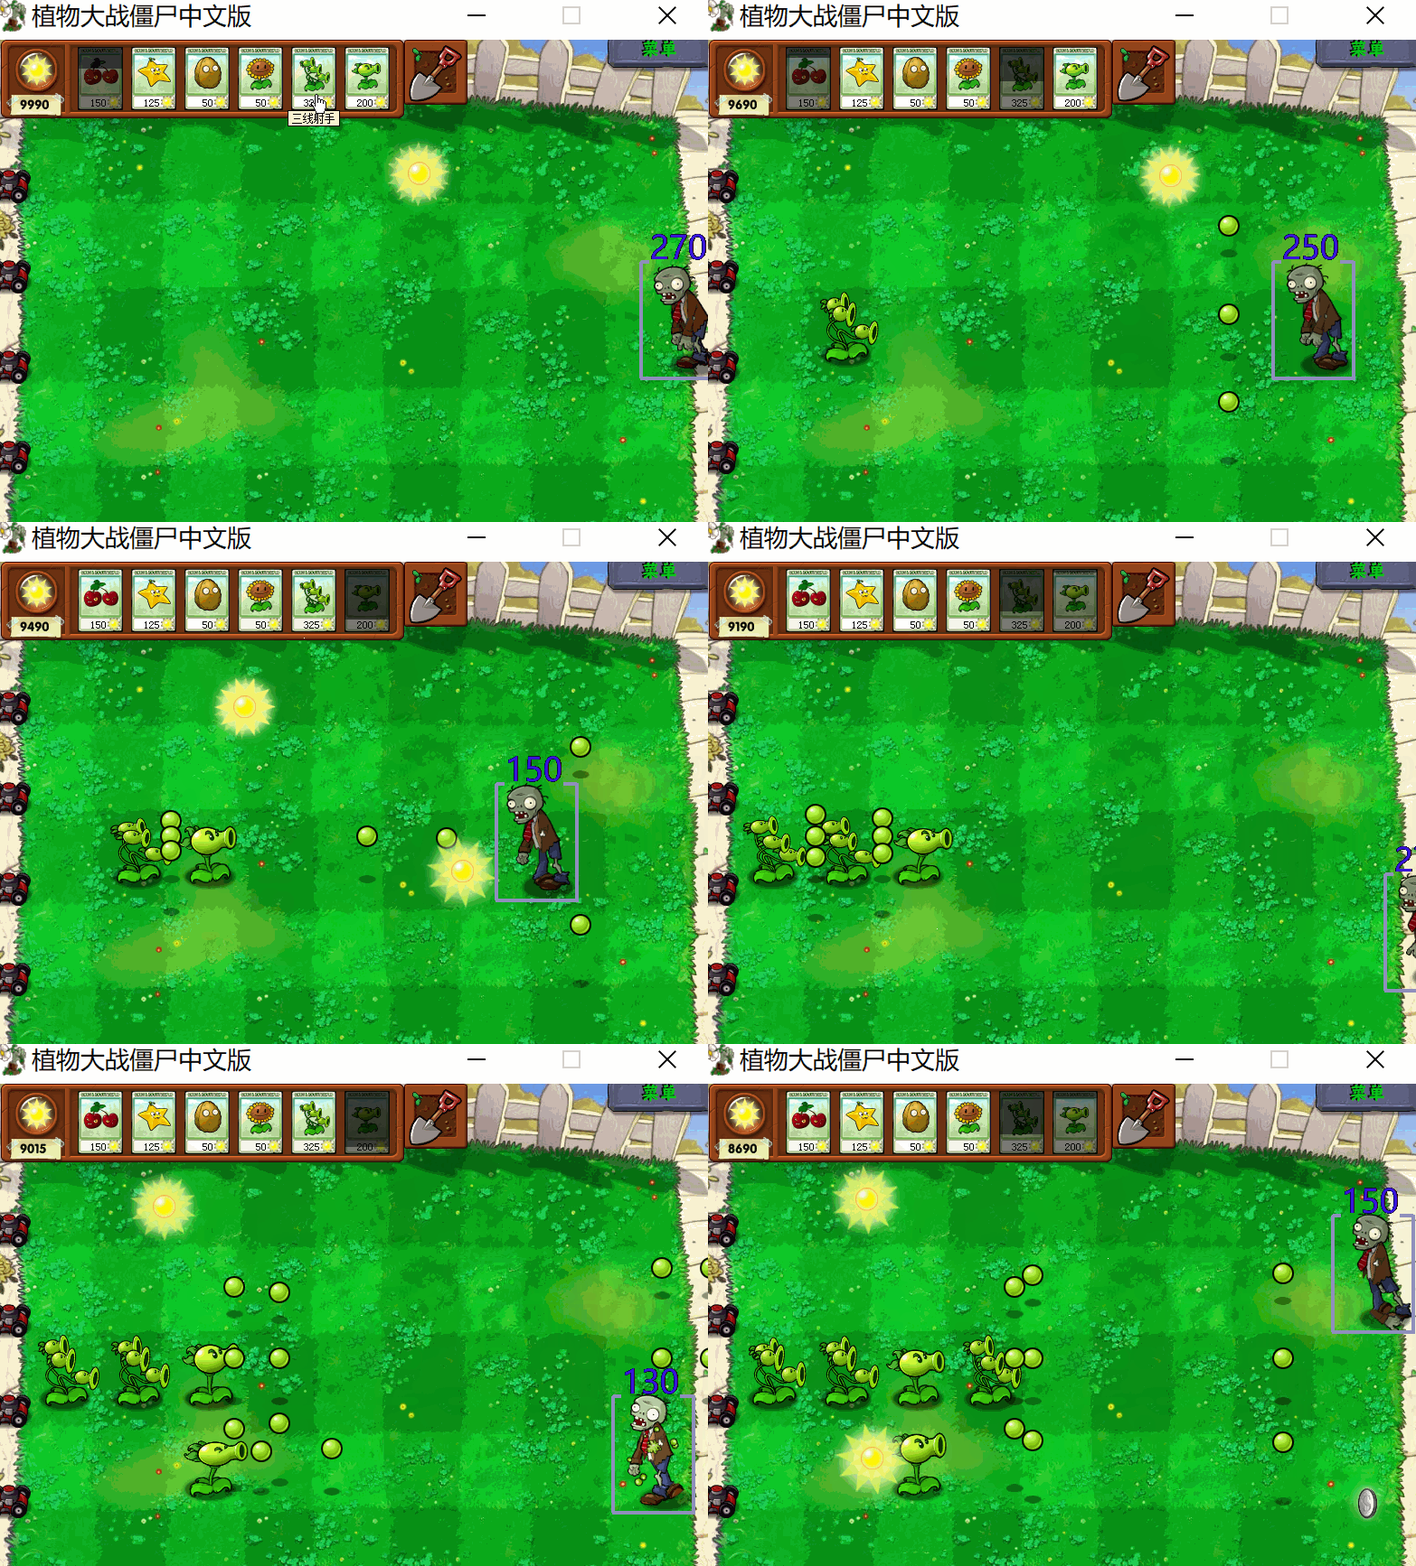
CE支持LUA和Plugin已经有一段时间了,但是相关的教程却并不是很多。LUA和Plugin的功能属实强大,今天就借着pvz绘制僵尸血量这个例子给大家侃侃CE的这两大功能
本教程分成两部分:
本上篇教程为LUA的使用部分
PS:原本是打算直接用LUA写个绘制就好,但没想到LUA里没有直接提供获取窗口位置信息的函数,如WIN32提供的GetWindowRect,为此就自己写个插件提供接口给LUA调用
效果图
先给大家看看效果

事前准备
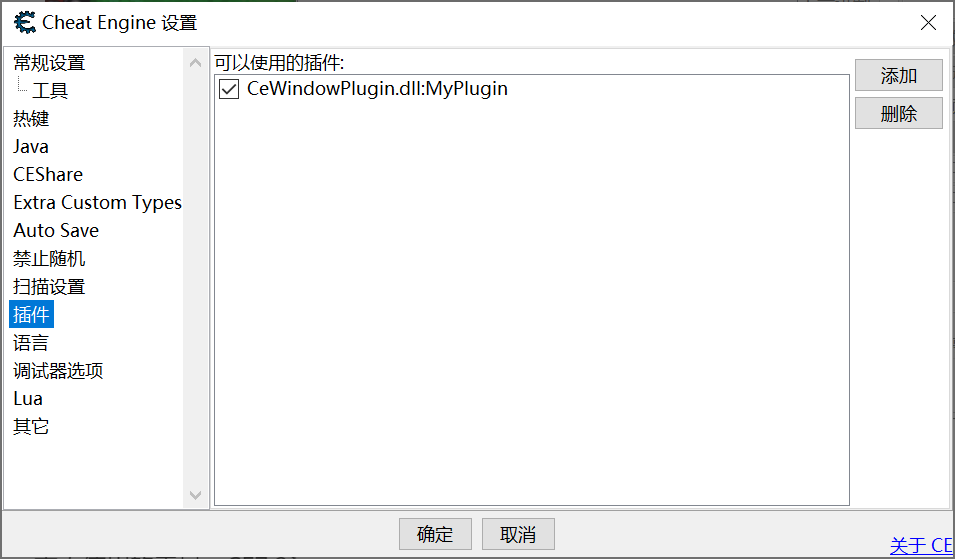
本人使用的工具:CE7.2汉化版(这次要注意版本,插件和CE版本相关,汉化与否不影响)
论坛有:https://down.52pojie.cn/Tools/Debuggers/Cheat%20Engine%20v7.2.exe
VS2015 (可以兼容XP的插件开发)
https://my.visualstudio.com/Downloads?q=visual%20studio%202015&wt.mc_id=o~msft~vscom~older-downloads
本人使用的游戏:植物大战僵尸原版的汉化版(非年度版) 就是阳光基址是006A9EC0+768+5560的那个(ps:劳模植物大战僵尸)
CE7.2源码一份:https://github.com/cheat-engine/cheat-engine/archive/7.2.zip
需要知道的pvz数据
前面我们通过汇编硬追基址知道了
僵尸头部数组的地址是0x6a9ec0+0x768+0x90,僵尸数量上限地址为0x6a9ec0+0x768+0x94
僵尸血量为僵尸地址+0xc8,僵尸x坐标为僵尸地址+0x8,僵尸y坐标为僵尸地址+0xc
不知道的朋友们可以戳这里看之前的教程:https://www.52pojie.cn/thread-1361473-1-1.html
知道了这些以后开启我们的LUA之旅
教程内容
编写我们的LUA绘制脚本
tip:遇到不懂的方法或属性可以查看下方提供的LUA参考文档
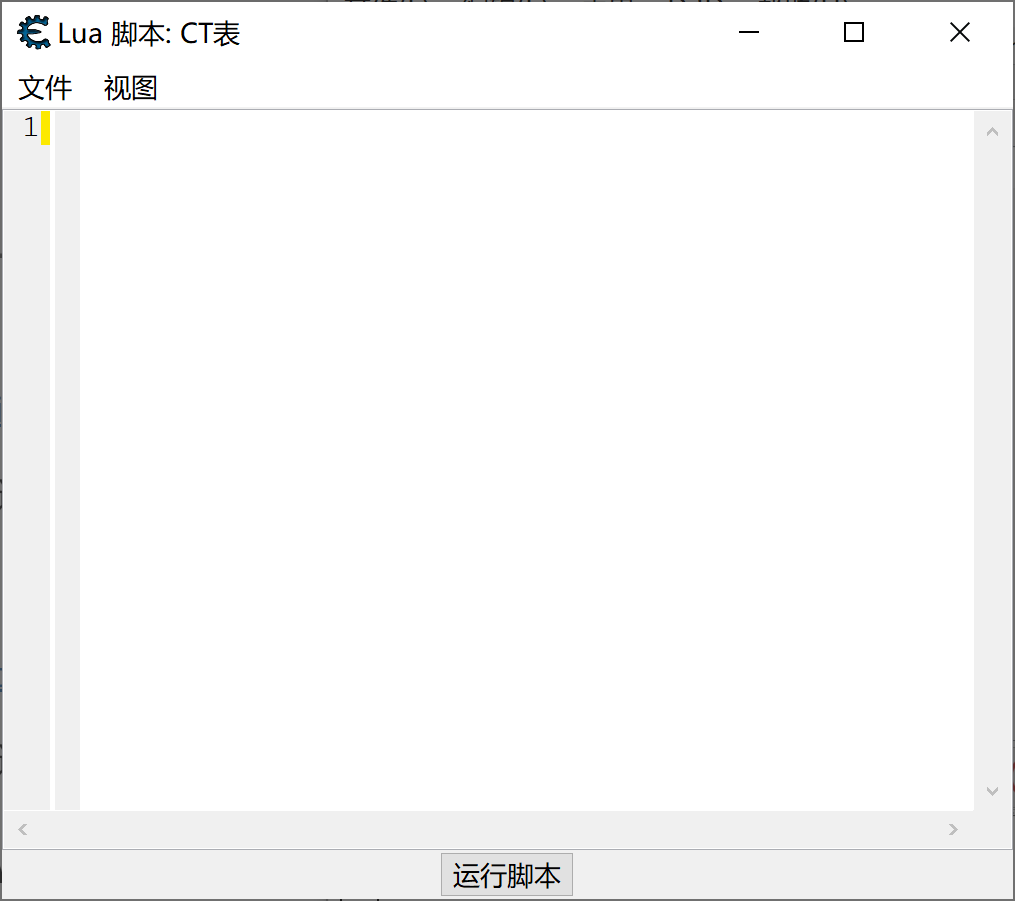
想要测试一个LUA脚本可以先打开LUA脚本窗口:表单→显示CT表的Lua脚本(Ctrl+Alt+L)
创建一个透明窗口
function createTransparentWindow()
    form=createForm()                   --创建窗体
    canvas=form.Canvas                  --获取canvas
    form.Color=0x000000                 --设置窗体颜色为黑色 和透明相关
    form.Width=getScreenWidth()         --设置窗体宽度为屏幕宽度
    form.Height=getScreenHeight()       --设置窗体高度为屏幕高度
    form.FormStyle='fsSystemStayOnTop'  --设置窗体风格为fsSystemStayOnTop,详见上方参考文档 这里为将窗口置顶
    form.BorderStyle='bsNone'           --设置窗体边界风格为bsNone,详见上方参考文档        这里为设置无边框
    form.setLayeredAttributes(0,0,LWA_COLORKEY) --设置窗口透明,详见上方参考文档
end
在透明窗口里绘制
如果要测试的话,记得要加上上面的createTransparentWindow代码
--设置画笔
function Pen(Color,Width)
canvas.Pen.Color=Color or 0xff00ff
canvas.Pen.Width=Width or 2
end
--设置字体
function Font(Color,Size)
canvas.Font.Color=Color or 0xff00ff
canvas.Font.Size=Size or 12
end
--绘制文字
function textOut(x,y,text,Color,Size)
Font(Color,Size)            --设置字体
canvas.Brush.Color=nil      --设置画刷颜色
canvas.textOut(x,y,text)    --输出文字
end
--画椭圆
function ellipse(x,y,x1,y1,Color,Width)
Pen(Color,Width)
canvas.ellipse(x,y,x1,y1)
end
--画圆
function circle(x,y,n,Color,Width)
Pen(Color,Width)
canvas.ellipse(x-n,y-n,x+n,y+n)
end
--画线
function line(sourcex,sourcey,destinationx,destinationy,Color,Width)
Pen(Color,Width)
canvas.line(sourcex,sourcey,destinationx,destinationy)
end
--画虚线矩形
function drawFocusRect(x1,y1,x2,y2,Color)
Font(Color)
canvas.drawFocusRect(x1,y1,x2,y2)
end
--绘制圆角矩形
function roundRect(x1,y1,x2,y2,rx,ry,Color,Width)
Pen(Color,Width)
canvas.roundRect(x1,y1,x2,y2,rx,ry)
end
--绘制矩形rect(x1,y1,x2,y2,Color,Width,b)如果b=true则绘制填充矩形
function rect(x1,y1,x2,y2,Color,Width,b)
Pen(Color,Width)
if b~= true then
   canvas.rect(x1,y1,x2,y2)
     else
   canvas.Brush.Color=Color or 0xff00ff
   canvas.fillRect(x1,y1,x2,y2)
   canvas.Brush.Color=nil
end
end
--刷新绘制
function Refresh()
form.repaint()
end
--绘制 传入function
function draw(mydraw)
form.OnPaint=mydraw     --设置OnPaint
end
--创建窗口
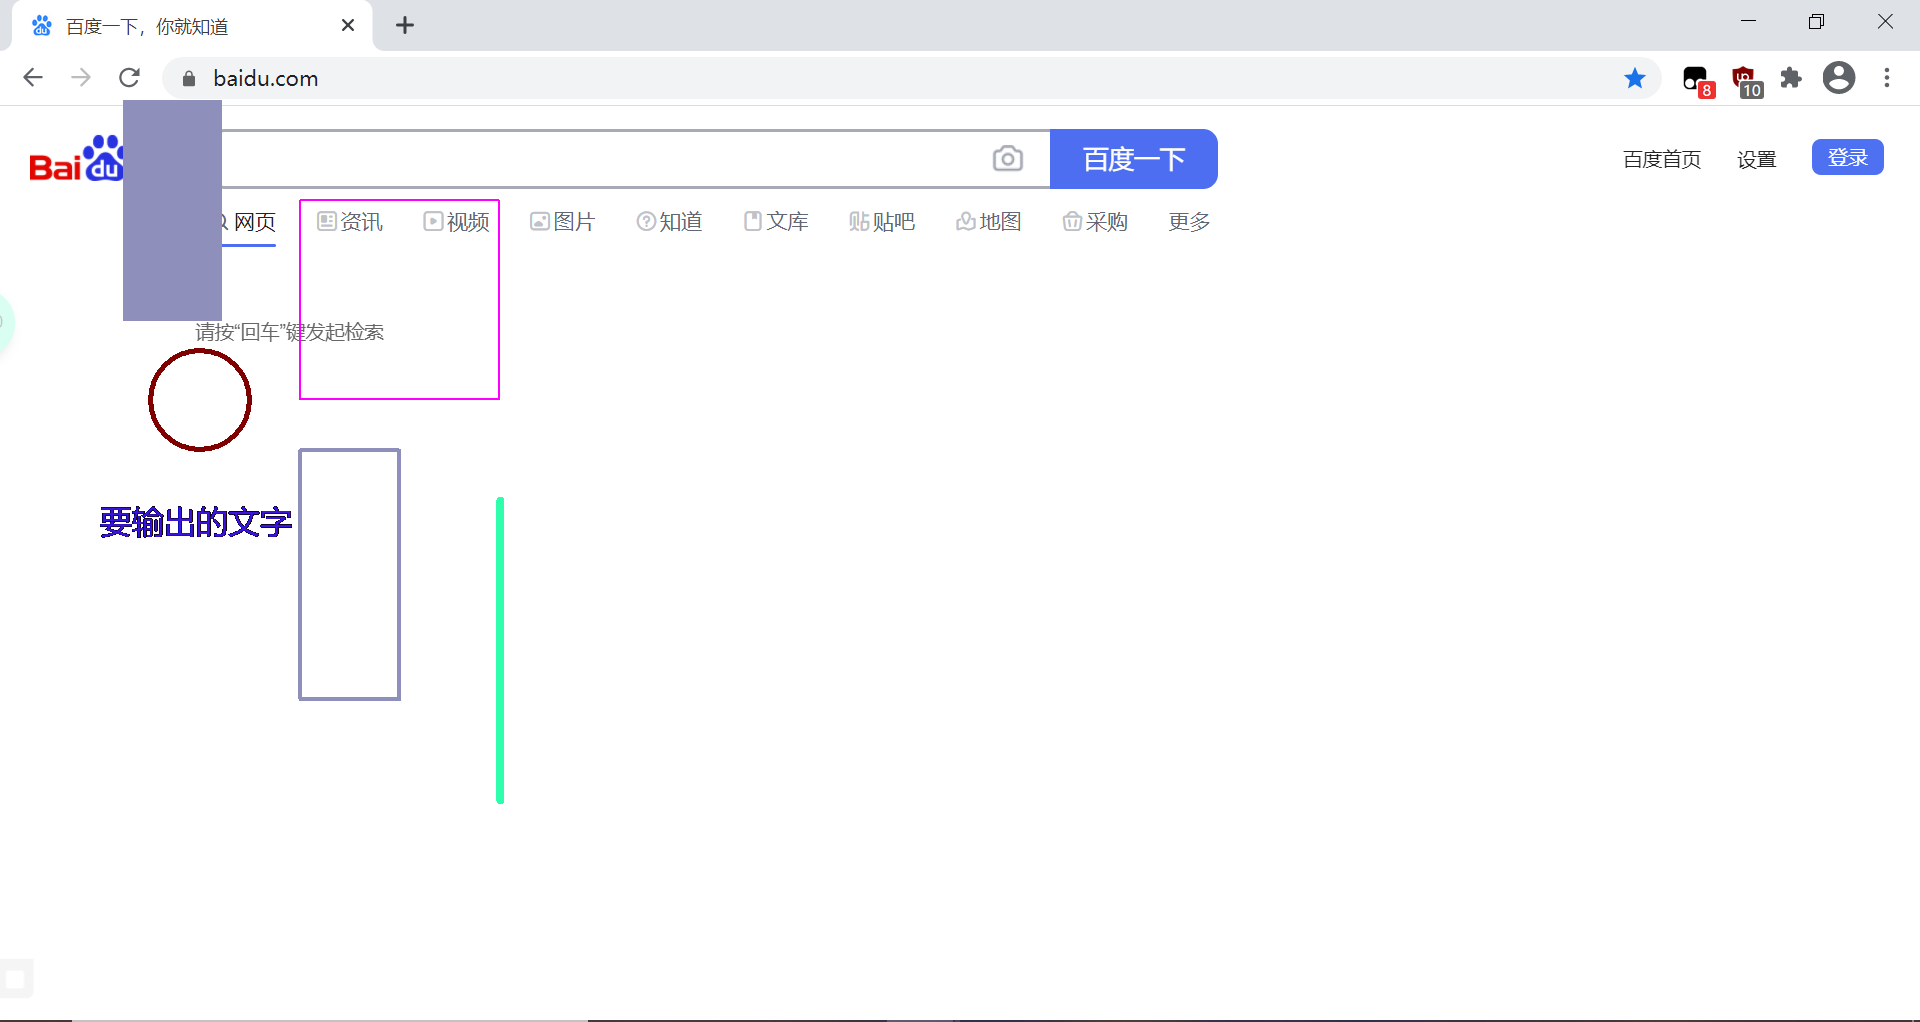
createTransparentWindow()
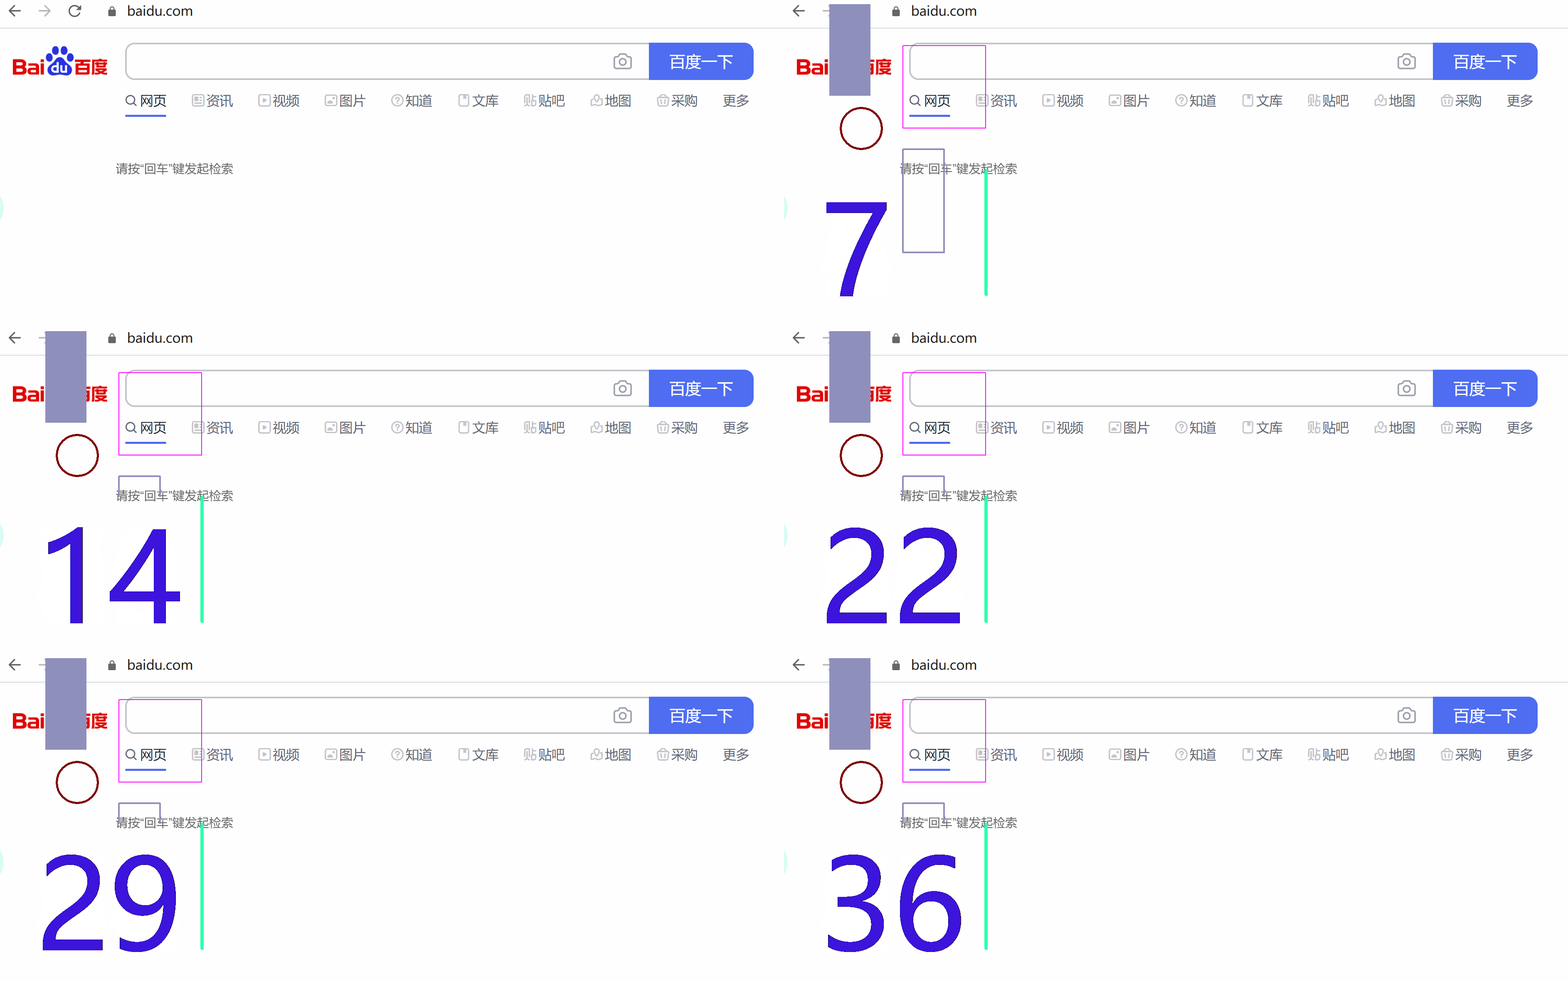
draw(function ()
--在这里写绘制
rect(300,400,500,200)
rect(400,700,300,450,0xBC8F8F,4)
rect(123,321,222,100,0xBC8F8F,4,true)
line(500,500,500,800,0xADFF2F,8)
circle(200,400,50,0x000080,5)
textOut(100,500,'要输出的文字',0xDC143C,16)
end)
Refresh()
执行结果
添加时钟实时绘制(绘制模板)
该模板没有用到我的插件
{$lua}
--表示下面的代码为lua
--语法检测,如果语法有误则不执行
if syntaxcheck then return end
[ENABLE]
--code from here to '[DISABLE]' will be used to enable the cheat
function createTransparentWindow()
    form=createForm()                   --创建窗体
    canvas=form.Canvas                  --获取canvas
    form.Color=0x000000                 --设置窗体颜色为黑色 和透明相关
    form.Width=getScreenWidth()         --设置窗体宽度为屏幕宽度
    form.Height=getScreenHeight()       --设置窗体高度为屏幕高度
    form.FormStyle='fsSystemStayOnTop'  --设置窗体风格为fsSystemStayOnTop,详见上方参考文档 这里为将窗口置顶
    form.BorderStyle='bsNone'           --设置窗体边界风格为bsNone,详见上方参考文档        这里为设置无边框
    form.setLayeredAttributes(0,0,LWA_COLORKEY) --设置窗口透明,详见上方参考文档
end
--设置画笔
function Pen(Color,Width)
canvas.Pen.Color=Color or 0xff00ff
canvas.Pen.Width=Width or 2
end
--设置字体
function Font(Color,Size)
canvas.Font.Color=Color or 0xff00ff
canvas.Font.Size=Size or 12
end
--绘制文字
function textOut(x,y,text,Color,Size)
Font(Color,Size)            --设置字体
canvas.Brush.Color=nil      --设置画刷颜色
canvas.textOut(x,y,text)    --输出文字
end
--画椭圆
function ellipse(x,y,x1,y1,Color,Width)
Pen(Color,Width)
canvas.ellipse(x,y,x1,y1)
end
--画圆
function circle(x,y,n,Color,Width)
Pen(Color,Width)
canvas.ellipse(x-n,y-n,x+n,y+n)
end
--画线
function line(sourcex,sourcey,destinationx,destinationy,Color,Width)
Pen(Color,Width)
canvas.line(sourcex,sourcey,destinationx,destinationy)
end
--画虚线矩形
function drawFocusRect(x1,y1,x2,y2,Color)
Font(Color)
canvas.drawFocusRect(x1,y1,x2,y2)
end
--绘制圆角矩形
function roundRect(x1,y1,x2,y2,rx,ry,Color,Width)
Pen(Color,Width)
canvas.roundRect(x1,y1,x2,y2,rx,ry)
end
--绘制矩形rect(x1,y1,x2,y2,Color,Width,b)如果b=true则绘制填充矩形
function rect(x1,y1,x2,y2,Color,Width,b)
Pen(Color,Width)
if b~= true then
   canvas.rect(x1,y1,x2,y2)
     else
   canvas.Brush.Color=Color or 0xff00ff
   canvas.fillRect(x1,y1,x2,y2)
   canvas.Brush.Color=nil
end
end
--刷新绘制
function Refresh()
form.repaint()
end
--绘制 传入function
function draw(mydraw)
form.OnPaint=mydraw     --设置OnPaint
end
createTransparentWindow()
cnt=0                    --计数,用来表示动态刷新数值
draw(function ()
--在这里写绘制
cnt=cnt+1
rect(300,400,500,200)
rect(400,700,300,450,0xBC8F8F,4)
rect(123,321,222,100,0xBC8F8F,4,true)
line(500,500,500,800,0xADFF2F,8)
circle(200,400,50,0x000080,5)
textOut(100,500,cnt,0xDC143C,100)
end)
--创建Timer
Timer=createTimer(getMainForm())
--时钟周期设置为0.1s
Timer.Interval=100
--添加时钟周期执行的函数
Timer.OnTimer= function(timer)
--刷新绘制
Refresh()
end
[DISABLE]
--code from here till the end of the code will be used to disable the cheat
Timer.Enabled=false
Timer.destroy()
form.destroy()
执行结果
lua和asm混用
Auto assembler scripts support section written in Lua.You can start such a section using the {$lua} keyword, and end it with {$asm}.
自动汇编脚本支持部分用Lua来写,你可以开始一段lua代码以 {$lua} 开始,以{$asm}结束lua代码
例:
{$asm}
alloc(newmem,2048)
{$lua}
print('this is lua')
{$asm}
label(originalcode)
修改绘制模板实现pvz僵尸血量绘制(需要加载插件)
{$lua}
--表示下面的代码为lua
--语法检测,如果语法有误则不执行
if syntaxcheck then return end
[ENABLE]
--code from here to '[DISABLE]' will be used to enable the cheat
function createTransparentWindow()
    form=createForm()                   --创建窗体
    canvas=form.Canvas                  --获取canvas
    form.Color=0x000000                 --设置窗体颜色为黑色 和透明相关
    form.Width=getScreenWidth()         --设置窗体宽度为屏幕宽度
    form.Height=getScreenHeight()       --设置窗体高度为屏幕高度
    form.FormStyle='fsSystemStayOnTop'  --设置窗体风格为fsSystemStayOnTop,详见上方参考文档 这里为将窗口置顶
    form.BorderStyle='bsNone'           --设置窗体边界风格为bsNone,详见上方参考文档        这里为设置无边框
    form.setLayeredAttributes(0,0,LWA_COLORKEY) --设置窗口透明,详见上方参考文档
end
--设置画笔
function Pen(Color,Width)
canvas.Pen.Color=Color or 0xff00ff
canvas.Pen.Width=Width or 2
end
--设置字体
function Font(Color,Size)
canvas.Font.Color=Color or 0xff00ff
canvas.Font.Size=Size or 12
end
--绘制文字
function textOut(x,y,text,Color,Size)
Font(Color,Size)            --设置字体
canvas.Brush.Color=nil      --设置画刷颜色
canvas.textOut(x,y,text)    --输出文字
end
--画椭圆
function ellipse(x,y,x1,y1,Color,Width)
Pen(Color,Width)
canvas.ellipse(x,y,x1,y1)
end
--画圆
function circle(x,y,n,Color,Width)
Pen(Color,Width)
canvas.ellipse(x-n,y-n,x+n,y+n)
end
--画线
function line(sourcex,sourcey,destinationx,destinationy,Color,Width)
Pen(Color,Width)
canvas.line(sourcex,sourcey,destinationx,destinationy)
end
--画虚线矩形
function drawFocusRect(x1,y1,x2,y2,Color)
Font(Color)
canvas.drawFocusRect(x1,y1,x2,y2)
end
--绘制圆角矩形
function roundRect(x1,y1,x2,y2,rx,ry,Color,Width)
Pen(Color,Width)
canvas.roundRect(x1,y1,x2,y2,rx,ry)
end
--绘制矩形rect(x1,y1,x2,y2,Color,Width,b)如果b=true则绘制填充矩形
function rect(x1,y1,x2,y2,Color,Width,b)
Pen(Color,Width)
if b~= true then
   canvas.rect(x1,y1,x2,y2)
     else
   canvas.Brush.Color=Color or 0xff00ff
   canvas.fillRect(x1,y1,x2,y2)
   canvas.Brush.Color=nil
end
end
--刷新绘制
function Refresh()
form.repaint()
end
--绘制 传入function
function draw(mydraw)
form.OnPaint=mydraw     --设置OnPaint
end

createTransparentWindow()
--获取窗口句柄    --这里的窗口类名MainWindow是事先用Spy++查看的 根据窗口类名得到窗口句柄
handle=findWindow('MainWindow')
--获取窗口标题
caption=getWindowCaption(handle)
--print(ansiToUtf8(caption))

draw(function ()
--在这里写绘制

--调用插件提供的函数获取窗口的位置信息
left,top,right,bottom=GetWindowRect(handle)

num=readInteger("[[006a9ec0]+768]+94")--得到僵尸数上限
--print(num)
addr=readInteger("[[006a9ec0]+768]+90")   --得到僵尸数组头部地址
cnt=0                                     --记录僵尸个数,达到数量上限则停止循环
--开始遍历僵尸数组并绘制
while( true )
do
  tmp=addr+cnt*0x15c             --获得僵尸地址

  hp=readInteger(tmp+0xc8)     --读取血量
  x=readInteger(tmp+0x8)
  y=readInteger(tmp+0xc)
  if(x<800 and hp>0) then      --判断位置是否在屏幕外和血量是否归零
  rect(x+10+left,y+50+top,x+100+left,y+180+top,0xBC8F8F,4,false)
  textOut(x+20+left,y+10+top,hp,0xDC143C,12)
  end

  --print("僵尸",cnt+1,"号","hp:",hp)
  --print("僵尸",cnt+1,"号","x坐标:",x)
  --print("僵尸",cnt+1,"号","y坐标:",y)
  cnt=cnt+1
  if(cnt>=num)
  then
      break
  end
end

end)
--创建Timer
Timer=createTimer(getMainForm())
--时钟周期设置为0.1s
Timer.Interval=100
--添加时钟周期执行的函数
Timer.OnTimer= function(timer)
--刷新绘制
Refresh()
end
[DISABLE]
--code from here till the end of the code will be used to disable the cheat
Timer.Enabled=false
Timer.destroy()
form.destroy()
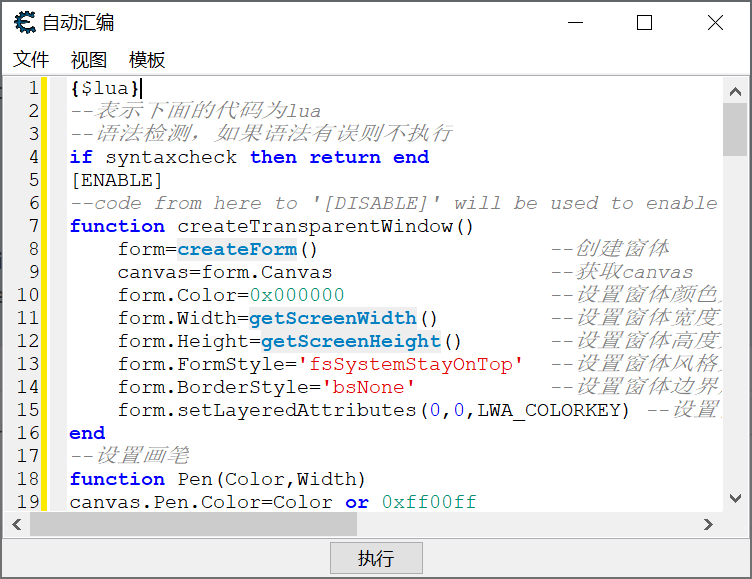
可以将以上代码复制到自动汇编窗口里然后 文件→分配到当前的CT表以后执行
不使用插件插件使用LUA间接调用
上述代码加上这个方法即无需插件
local function GetWindowRect(hWnd)
--创建一个内存流
local My = createMemoryStream()
--设置流的大小
My.Size= 16
--获取要调用的方法地址
--user32为要调用的模块名 后面的GetWindowRect为要调用的方法(该方法在user32模块中),hWnd是要调用的参数
--调用win32 API
executeCodeLocalEx('user32.GetWindowRect',hWnd,My.Memory)
local left= My.readDword()
if left > 0xffffff then
left= -0xfffffffe~left
end

local top=My.readDword()
local right=My.readDword()
local bottom=My.readDword()

My.destroy()
return left,top,right,bottom
end
LUA参考文档
LUA文档查询
CE Lua的相关接口可以参考:
https://wiki.cheatengine.org/index.php?title=Lua
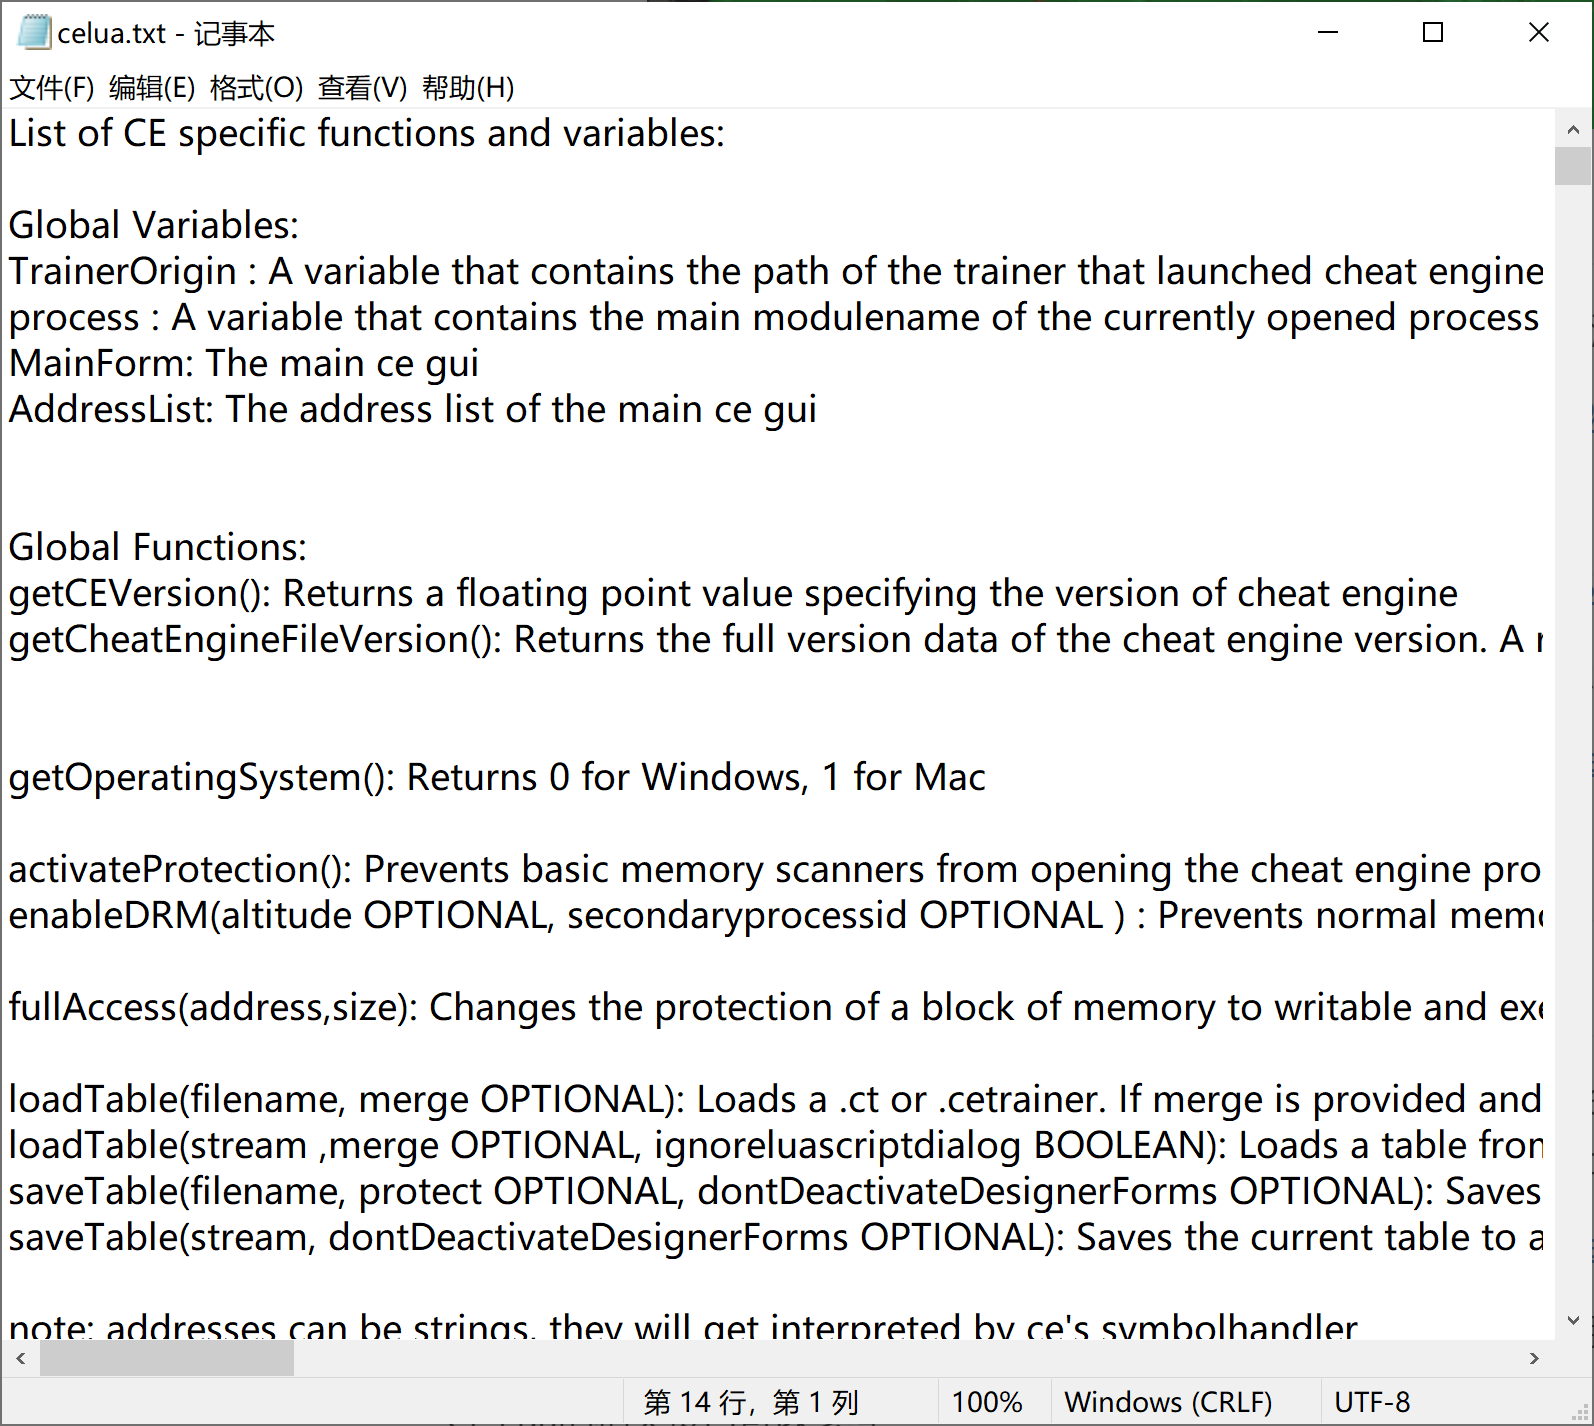
具体函数的内容通过 帮助(H)→Cheat Engine Lua文件来查看:
LUA常用函数介绍
数据读取相关
function readInteger(Address) : integer
Reads a DWORD (4 bytes) at the given address and interprets them as an integer
在给定的地址读取一个DWORD(4字节)并且将他们以integer(整型)类型返回
CEAddressString是CE自己定义的一种数据类型,是CE内部的一种格式化的字符串,作为 internal symbol handler(内部符号handler)用来表示一个地址,例:
sun=readInteger("[[006a9ec0]+768]+5560")
读取阳光的数值,[]代表读取地址里面的值,这里面的偏移默认就是十六进制
同样的也可以写成
addr=readInteger(0x6a9ec0)      --这里注意要加上0x 表示十六进制
addr=addr+0x768         --一级偏移
addr=readInteger(addr)
addr=addr+0x5560            --二级偏移
sun=readInteger(addr)
和数据读取相关的函数还有很多,如
readBytes
readSmallInteger
readQword
readPointer
readFloat
readDouble
readString
其使用方法大同小异,我这里就不每个都介绍了,感兴趣的可以自己去研究研究
而我的教程里只用到了readInteger于是接着介绍其它Lua函数了
接下来介绍有关绘制的相关类,主要是自己翻译和补充了一下参考文档,之前绘制透明窗口用到相关的类,类的来源在这里
绘制相关类(参考文档)
(Inheritance: ScrollingWinControl->CustomControl->WinControl->Control->Component->Object)
Form的Canvas属性继承自CustomControl、Color属性继承自Control
Form的setLayeredAttributes方法继承自WinControl
这里的Form是Delphi绘制的Form,Form属性可参考DelPhi的Form,PS:CE的文档并不是很全
Delphi Form参考链接:http://docwiki.embarcadero.com/Libraries/Sydney/en/Vcl.Forms.TForm_Properties
属性(列举了CE文档里没有的)
FormStyle(窗体样式):
| Value(值) |
Meaning(意义) |
| fsNormal |
该窗体既不是MDI父窗口,也不是MDI子窗口 |
| fsMDIChild |
该窗体是一个MDI子窗口 |
| fsMDIForm |
该窗体是一个MDI父窗口 |
| fsStayOnTop |
该窗体始终在桌面和项目中的其他窗体的顶部,但FormStyle设置为fsStayOnTop的其他窗体除外。如果一个fsStayOnTop窗体启动另一个fsStayOnTop窗体,那么两个表单都不会始终保持在顶部 |
参考链接:http://docwiki.embarcadero.com/Libraries/Sydney/en/Vcl.Forms.TForm.FormStyle
BorderStyle(边界样式)
| Value(值) |
Meaning(意义) |
| bsDialog |
不能调整大小的;没有菜单最小化或最大化 |
| bsSingle |
没有可调整大小的;有最小化或最大化菜单 |
| bsNone |
没有可调整大小的;无可见边界线 |
| bsSizeable |
标准可调整大小的边界 |
| bsToolWindow |
像bsSingle,但是标题更小 |
| bsSizeToolWin |
像bsSizeable但标题要小一些 |
参考链接:http://docwiki.embarcadero.com/Libraries/Sydney/en/Vcl.Forms.TCustomForm.BorderStyle
CustmControl class
(CustomControl->WinControl->Control->Component->Object)
属性
- Canvas(画布) : 在控件中用来绘制的画布对象
- OnPaint: 一个OnPaint 事件,你可以设置它来做一些额外的绘制
方法
- getCanvas() : 在给定的对象(这个对象继承自customControl)中返回Canvas对象
WinControl Class
属性
- Handle(句柄): Integer - The internal windows handle(内部窗口局部)
- DoubleBuffered(双缓冲): boolean - Graphical updates will go to a offscreen bitmap which will then be shown on the screen instead of directly to the screen. May reduce flickering(图形更新将转到屏幕外的位图,然后该位图将显示在屏幕上,而不是直接显示在屏幕上。可减少闪烁)
- ControlCount(控件数) : integer - The number of child controls of this wincontrol(这个控件的子控件数)
- Control[] (子控件数组): Control - Array to access a child control(子控件数组 用来访问子控件)
- OnEnter(进入事件) : function - Function to be called when the WinControl gains focus(当该控件获取焦点时被调用的事件)
- OnExit (退出事件): function - Function to be called when the WinControl loses focus(当该控件失去焦点时被调用的事件)
方法
- getControlCount() Returns the number of Controls attached to this class(返回依附此类的控件数)
- getControl(index) : Returns a WinControl class object(返回一个WinControl 类对象)
- getControlAtPos(x,y): Gets the control at the given x,y position relative to the wincontrol's position(获取相对于wincontrol位置的给定x,y位置的控件)
- canFocus(): returns true if the object can be focused(返回真如果如果该对象可被聚焦)
- focused(): returns boolean true when focused(返回真如果该对象正获得焦点)
- setFocus(): tries to set keyboard focus the object(尝试设置对象的键盘焦点)
- setShape(Region): Sets the region object as the new shape for this wincontrol(设置region对象作为该控件的新形状)
- setShape(Bitmap):
- setOnEnter(function) : Sets an onEnter event. (Triggered on focus enter)(设置一个进入事件 当焦点进入时触发)
- getOnEnter()
- setOnExit(function) : Sets an onExit event. (Triggered on lost focus)(设置一个退出事件 当焦点失去时触发)
- getOnExit()
- setLayeredAttributes(Key, Alpha, Flags) : Sets the layered state for the control if possible (Only Forms are supported in in windows 7 and earlier) (如果可行的话 为控件设置层次状态(windows 7及更早版本中仅支持窗体))flags can be a combination of LWA_ALPHA and/or LWA_COLORKEY (标志可以是 LWA_ALPHA 和/或LWA_COLORKEY )
See msdn SetLayeredWindowAttributes for more information(参考msdn的SetLayeredWindowAttributes 来获取更多信息)
LWA_ALPHA时:crKey参数无效,bAlpha参数有效;
LWA_COLORKEY:窗体中的所有颜色为crKey的地方将变为透明,bAlpha参数无效。其常量值为1。
LWA_ALPHA | LWA_COLORKEY:crKey的地方将变为全透明,而其它地方根据bAlpha参数确定透明度。
Control Class
(Inheritance: Component->Object)
属性
-
Caption(标题): string - The text of a control(控件文本)
-
Top(顶部) : integer - The x position(x位置)
-
Left (左边): integer - The y position(y位置)
-
Width (宽): integer - The width of the control(控件宽度)
-
Height (高): integer - The height of the control(控件高度)
-
ClientWidth(Client宽度): integer - The usable width inside the control (minus the borders)(在控件里的可用宽度,减少边界)
-
ClientHeight(Client高度): integer - The usable height the control (minus the borders)(在控件里的可用高度,减少边界)
-
Align(对齐): AlignmentOption - Alignment of the control(控件对齐)
-
Enabled(启用): boolean - Determines if the object is usable or greyed out(决定对象是否可用)
-
Visible(可见): boolean - Determines if the object is visible or not(决定对象是否可见)
-
Color(颜色): ColorDefinition/RGBInteger - The color of the object. Does not affect the caption(对象的颜色,不影响标题)
-
RGBColor(RGB颜色): RGBInteger - The color of the object in RGB formatting(对象的颜色,RGB格式)
-
Parent(父类): WinControl - The owner of this control(这个控件的拥有者)
-
PopupMenu(弹出菜单): PopupMenu - The popup menu that shows when rightclicking the control
弹出菜单(在右键控件时显示)
-
Font(字体): Font - The font class associated with the control
和控件绑定的字体类
-
OnClick(点击事件): function(sender) - The function to call when a button is pressed
当按钮按下后被调用的方法
-
OnChangeBounds(改变Bounds事件):function(sender) - Called when the size or position of the control changes
当控件的大小或位置改变时调用的方法
Canvas Class
(Inheritance: CustomCanvas->Object)
属性
- Brush(画刷): Brush - The brush object
- Pen(画笔): Pen - The pen object
- Font(字体): Font - The font object
- Width(宽): integer - Width of the canvas
- Height(高): integer - Height of the canvas
- Handle(句柄): integer - DC handle of the canvas
方法
-
getBrush(): Returns the brush object of this canvas(返回该画布的画刷对象)
-
getPen(): Returns the pen object of this canvas(返回该画布的画笔对象)
-
getFont(): Returns the font object of this canvas(返回该画布的字体对象)
-
getWidth()(返回画布宽度)
-
getHeight()(返回画布高度)
-
getPenPosition()(获得画笔位置)
-
setPenPosition(x,y)(设置画笔位置)
-
clear() - Clears the canvas(清空画布)
-
line(sourcex, sourcey, destinationx, destinationy)(画线,参数为(起点x坐标,起点y坐标,终点x坐标,终点y坐标))
-
lineTo(destinationx, destinationy)(添加一个新点,然后创建从该点到画布中最后指定点的线条)
-
moveTo(destinationx, destinationy)(开始一条路径,移动到位置 x,y)
-
rect(x1,y1,x2,y2) - Draws a rectangle(画一个矩形 参数(矩形左上顶点x,矩形左上顶点y,矩形右下顶点x,矩形右下顶点y))
-
fillRect(x1,y1,x2,y2) - Draws a filled rectangle(画一个填充的矩形)
-
roundRect(x1,y1,x2,y2,rx,ry) - Draws a rectangle with rounded corners(画一个圆角矩形)
-
drawFocusRect(x1,y1,x2,y2) - Draws the focus rectangle shape(画一个焦点矩形)
-
textOut(x,y, text)(输出文字)
-
textRect(rect,x,y,text): write the text within the given rectangle. The text supports some ansi escape characters
在给定的矩形内写下文本。文本支持一些ansi转义字符
-
getTextWidth(text)(获取文本宽度)
-
getTextHeight(text)(获取文本高度)
-
getPixel(x,y)(获得指定坐标点的像素的RGB颜色值)
-
setPixel(x,y,color)(设置指定坐标点的像素的RGB颜色值)
-
floodFill(x,y, color OPTIONAL default=brush.Color, filltype OPTIONAL default=fsSurface): Fills the picture till/with a color.(颜色填充)
filltype can be
fsSurface: fill till the color (it fills all except this color)
fsBorder: fill this color (it fills only connected pixels of this color)
-
ellipse(x1,y1,x2,y2)(画椭圆)
-
gradientFill(x1,y1,x2,y2, startcolor, stopcolor, direction) : Gradient fills a rectangle. Direction can be 0 or 1. 0=Vertical 1=Horizontal
填充三角形和矩形颜色 可参考https://baike.baidu.com/item/GradientFill/6377439?fr=aladdin
-
copyRect(dest_x1,dest_y1,dest_x2,dest_y2, sourceCanvas, source_x1,source_y1,source_x2,source_y2) : Draws an image from one source to another. Useful in cases of doublebuffering
将图像从一个源绘制到另一个源。在双重缓冲的情况下有用
-
strectDraw(rectdraw(x,y, graphic) : Draw the image of a specific Graphic class
绘制特定图形类的图像
-
stretchDraw(rect, graphic): Draw the image of a specific Graphic class and stretch it so it fits in the given rectangle
绘制特定图形类的图像并拉伸它,使其适合给定的矩形
-
getClipRect() : Returns a table containing the fields Left, Top, Right and Bottom, which define the invalidated region of the graphical object. Use this to only render what needs to be rendered in the onPaint event of objects
返回包含字段Left、Top、Right和Bottom的表,这些字段定义图形对象的无效区域。使用此选项仅渲染对象的onPaint事件中需要渲染的内容
Pen Class
(Inheritance: CustomPen->CanvasHelper->Object)
属性
方法
-
getColor() (获取颜色)
-
setColor(color)(设置颜色)
-
getWidth() (获取宽度)
-
setWidth(width)(设置宽度)
Brush Class
(Inheritance: CustomBrush->CanvasHelper->Object)
属性
方法
- getColor() (获取颜色)
- setColor(color)(设置颜色)
Font Class
(Inheritance: CustomFont->CanvasHelper->Object)
属性
-
Name: string(名字)
-
Size: integer(大小)
-
Height: integer(高度)
-
Orientation: integer(旋转角度, 单位是 1/10 度)
-
Pitch: string - 'fpDefault', 'fpVariable', 'fpFixed'
字间距相关的, 有三个枚举值可选
-
Color: integer(颜色)
-
CharSet: integer(字符集, 是个整数)
ANSI_CHARSET = 0;
DEFAULT_CHARSET = 1;
SYMBOL_CHARSET = 2;
SHIFTJIS_CHARSET = 128;
HANGEUL_CHARSET = 129;
GB2312_CHARSET = 134;
CHINESEBIG5_CHARSET = 136;
OEM_CHARSET = 255;
JOHAB_CHARSET = 130;
HEBREW_CHARSET = 177;
ARABIC_CHARSET = 178;
GREEK_CHARSET = 161;
TURKISH_CHARSET = 162;
VIETNAMESE_CHARSET = 163;
THAI_CHARSET = 222;
EASTEUROPE_CHARSET = 238;
RUSSIAN_CHARSET = 204;
-
Quality: string - 'fqDefault', 'fqDraft', 'fqProof', 'fqNonAntialiased', 'fqAntialiased', 'fqCleartype', 'fqCleartypeNatural'
| Value(值) |
Meaning(含义) |
| fqDefault |
quality 由系统设置决定 |
| fqDraft |
对于光栅字体,启用缩放;字体大小可以增加,但质量可能会降低。如果需要,字体还支持粗体、斜体、下划线或删除线。The quality is less important than when Proof is used. |
| fqProof |
字符的quality很重要,因此对于光栅字体,禁用缩放,并选择大小最接近的字体 |
| fqNonAntialiased |
字体从不抗锯齿 |
| fqAntialiased |
如果字体支持抗锯齿,它总是抗锯齿的。字体大小不能太小或太大 |
| fqClearType |
字体使用ClearType抗锯齿方法渲染 |
| fqClearTypeNatural |
字体使用ClearTypeNatural抗锯齿方法渲染 |
-
Style: string set - ['fsBold', 'fsItalic', 'fsStrikeOut', 'fsUnderline']
fsBold 粗体
fsItalic 斜体
fsUnderline 下划线
fsStrikeOut 删除线
方法
-
getName(): Gets the fontname of the font
获取字体的字体名
-
setName(string): Sets the fontname of the font
设置字体的字体名
-
getSize(): Gets the size of the font
获取字体大小
-
setSize(integer): Sets the size of the font
设置字体大小
-
getColor(): Gets the color of the font
获取字体颜色
-
setColor(integer): Sets the color of the font
设置字体颜色
-
assign(font): Copies the contents of the font given as parameter to this font
将作为参数给定的字体的内容复制到此字体
时钟类(参考文档)
Timer Class
(Inheritance: Component->object)
属性
方法
-
getInterval() 获取时钟周期
-
setInterval(interval) : Sets the speed on how often the timer should trigger. In milliseconds (1000=1 second)
设置时钟周期
-
getOnTimer() 获取时钟事件
-
setOnTimer(function(timer)) 设置时钟事件
-
getEnabled() 获取是否激活
-
setEnabled(boolean) 设置是否激活
内存流相关类(参考文档)
MemoryStream Class
(Inheritance: Stream->Object)
MemoryStream的Size属性继承自Stream Class
属性
-
Memory: Integer - The address in Cheat Engine's memory this stream is loaded (READONLY, tends to change on size change)
内存 此流加载的CE内存中的地址 (只读,随size变化而变化)
方法
-
loadFromFile(filename) : Replaces the contents in the memory stream with the contents of a file on disk
用磁盘上文件的内容替换内存流中的内容
-
saveToFile(filename) : Writes the contents of the memory stream to the specified file
将内存流的内容写入指定的文件
-
loadFromFileNoError(filename):boolean,string - Replaces the contents in the memory stream with the contents of a file on disk. On success returns true, else false with a secondary return the error message
用磁盘上文件的内容替换内存流中的内容。成功时返回true,否则返回false,并返回错误消息
-
saveToFileNoError(filename):boolean,string - Writes the contents of the memory stream to the specified file. On success returns true, else false with a secondary return the error message
将内存流的内容写入指定的文件。成功时返回true,否则返回false,并返回错误消息
Stream Class
属性
- Size: integer(流的大小)
- Position: integer(流的位置)
方法
-
copyFrom(stream, count) - Copies count bytes from the given stream to this stream
将给定流中的count字节复制到此流
-
read(count): bytetable - Returns a bytetable containing the bytes of the stream. This increases the position
返回包含流字节的字节表。这会增加position
-
write(bytetable, count OPTIONAL)- Writes the given bytetable to the stream
将给定的bytetable写入流
-
readByte(): integer
-
writeByte(integer)
-
readWord(): integer
-
writeWord(integer)
-
readDword(): integer
-
writeDword(integer)
-
readQword(): integer
-
writeQword(integer)
-
readAnsiString(): string
-
writeAnsiString(string)
其它绘制用到的方法(参考方法)
参考链接:https://wiki.cheatengine.org/index.php?title=Lua:Class:Form
创建窗体:
createForm(visible OPT)
Creates a Form class object(window) and returns the pointer for it. Visible is default true but can be changed
创建一个Form 类对象(窗口) 并返回指向它的指针。默认是可见的窗体,但可以被改变
| 参数 |
参数类型 |
描述 |
| visible OPT |
bool |
创建的窗口是否可见 true为可见 false为不可见 |
| 返回值 |
返回值类型 |
描述 |
| pointer for the created form |
pointer |
指向创建出来的form的指针 |
例:createForm(true)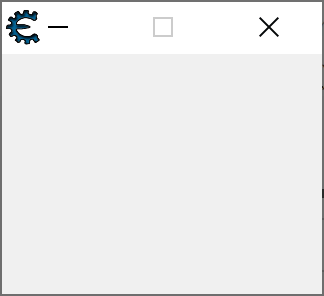
getScreenHeight
参考链接:getScreenHeight
无参数
| 返回值 |
返回值类型 |
描述 |
| screenHeight |
integer |
屏幕高度 |
getScreenWidth
参考链接:getScreenWidth
无参数
| 返回值 |
返回值类型 |
描述 |
| screenWidth |
integer |
屏幕宽度 |
createTimer
参考链接:createTimer
createTimer(Owner OPTIONAL, Enabled OPTIONAL) : Timer
| 参数 |
参数类型 |
描述 |
| Owner |
Control or Component based object |
计时器的所有者(用于资源清理) |
| Enabled |
boolean |
计时器的启用状态,设置为false以在创建时禁用计时器 |
| 返回值 |
返回值类型 |
描述 |
| timer |
Timer |
新创建的timer对象 |
Tip: 使用getMainForm 方法作为owner(创建者) 可以使得计时器和main form同步摧毁
findWindow
findWindow(classname OPTIONAL, caption OPTIONAL): windowhandle
Finds a window with the given classname and/or windowname
根据给定的窗口类名和/或窗口名称得到窗口句柄
| 参数 |
参数类型 |
描述 |
| classname |
string |
窗口类名 |
| caption |
string |
窗口标题名称 |
| 返回值 |
返回值类型 |
描述 |
| windowhandle |
windowhandle |
窗口句柄 |
getWindowCaption
getWindowCaption(windowhandle) : string
Returns the caption of the window
返回窗口的标题
| 参数 |
参数类型 |
描述 |
| windowhandle |
windowhandle |
窗口句柄 |
| 返回值 |
返回值类型 |
描述 |
| caption |
string |
窗口标题名称 |
补充方法(可以间接调用Win32 API等)
createMemoryStream
创建一个内存流,返回指向创建出来的内存流指针
executeCodeLocalEx
executeCodeLocalEx(address, {type=x,value=param1} or param1,{type=x,value=param2} or param2,...)
Calls a function using the given callmethod and parameters
使用给定的调用方法和参数来调用一个函数
If a direct parameter is given instead of a table entry describing the type, CE will 'guess' the type it is
如果给定的是直接参数而不是描述类型的表项,CE将'猜'它是什么类型
Returns the E/RAX value returned by the called function (if no timeout or other interruption)
返回由被调用函数返回的 E/RAX 值 (如果没有超时或其它错误)
| 参数 |
参数类型 |
描述 |
| address |
string |
模块名或export |
| param |
? |
指定方法所需参数 多个参数通过逗号连接 |
| memory |
MemoryStream.Memory |
内存地址 |
| 返回值 |
返回值类型 |
描述 |
| ? |
? |
由被调用方法决定返回值 |
getAddress
getAddress(string , local OPTIONAL)
returns the address of a symbol. Can be a modulename or an export. set Local to true if you wish to querry the symboltable of the ce process
返回一个符号的地址。可以是一个模块名或一个export。设置local为true如果你想要查询ce进程的符号表
| 参数 |
参数类型 |
描述 |
| symbol or export |
string |
模块名或export |
| local |
bool |
设置local为true如果你想要查询ce进程的符号表 |
| 返回值 |
返回值类型 |
描述 |
| address |
number |
地址 |
注意事项
LUA的参考文档是本人集合CE官方的文档和Delphi等相关资料翻译整理而成,可能会有些地方并不是很准确,仅供参考
(翻译和找文档真的好不容易QAQ)
提供的CT表里有三个脚本:

pvz的两个绘制脚本不要同时开启!!!
我自己写的插件只是提供了GetWindowRect方法,并没有提供其它东西,主要是让大家了解CE插件的使用及开发
限于文章篇幅,此教程作为上篇仅为LUA的绘制教程,有关插件的开发教程放到下篇
个人感言及附件下载
CE其实提供了不少给开发者拓展的功能,如LUA脚本、Plugin开发等等,但用到这些功能的人却并不那么多,于是抱着探索的态度和大家一起聊聊CE的这两大功能
帮助者的感谢
有关LUA的使用部分尤为感谢Blank™ 这位大佬,绘制模板是从他那里拿来修改解析的,还有无需插件调用WIN32 API也是由他提供的帮助,傻傻的我还特地跑去开发插件了QAQ
附件详情
此篇教程为上篇,附件提供为
LUA的绘制模板脚本及pvz的绘制脚本(需要插件和不需要插件)以及本人开发的插件
有关插件的具体开发流程以及插件的源码等会放在下篇
最后希望大家能多多支持一下我QAQ,肝教程太累了,你们的支持是对我最大的鼓励,以上~~~~
 发表于 2021-2-10 14:04
 |
发表于 2021-2-10 14:05
 发表于 2021-2-10 23:18
 发表于 2021-2-10 14:46
 发表于 2021-2-10 14:48
 |
发表于 2021-2-10 15:14