本帖最后由 苏紫方璇 于 2021-5-7 14:22 编辑
1.新建一个.NET Core类库

2.新增一个方法,并编译项目

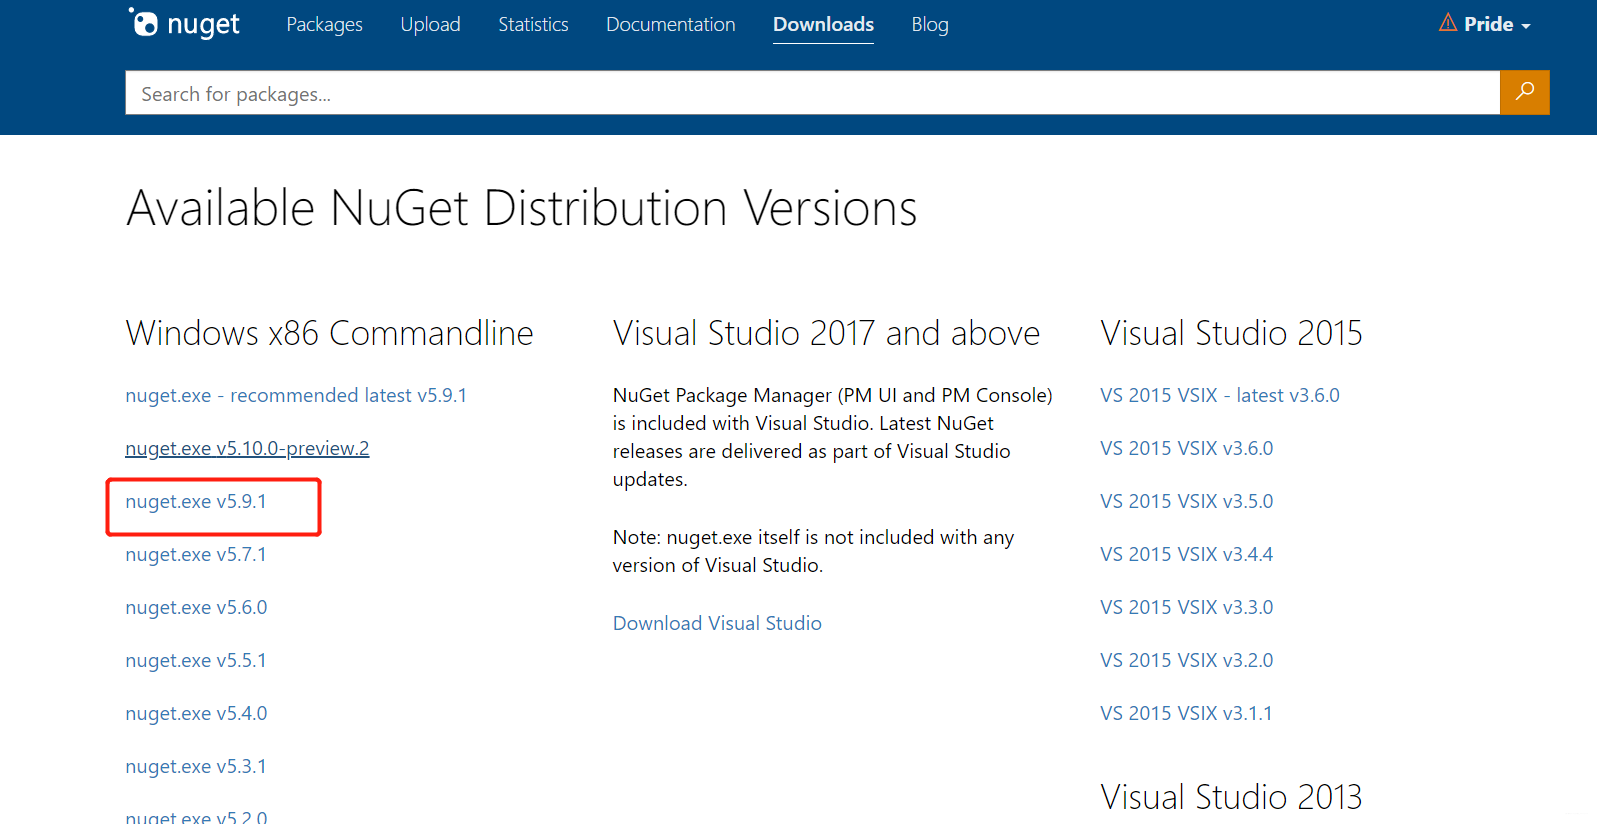
3.下载Nuget.exe,与刚才新建的类库放在同一目录下
下载地址:https://www.nuget.org/downloads

4.在Nuget官网注册账号
官网地址:https://www.nuget.org/
创建一个Key
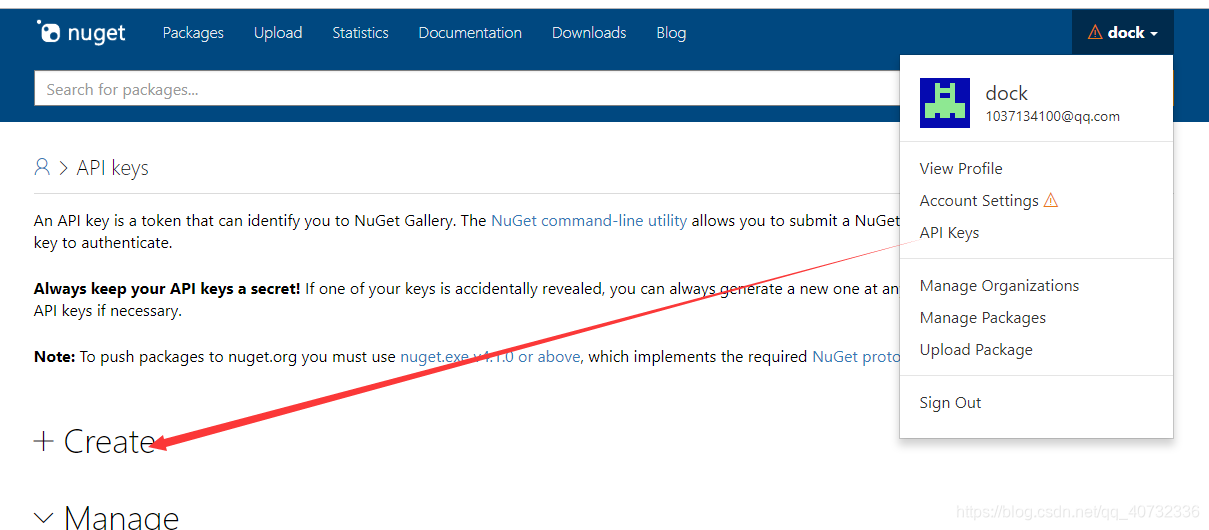

Key Name 和 Glob Pattern 名称一样就好
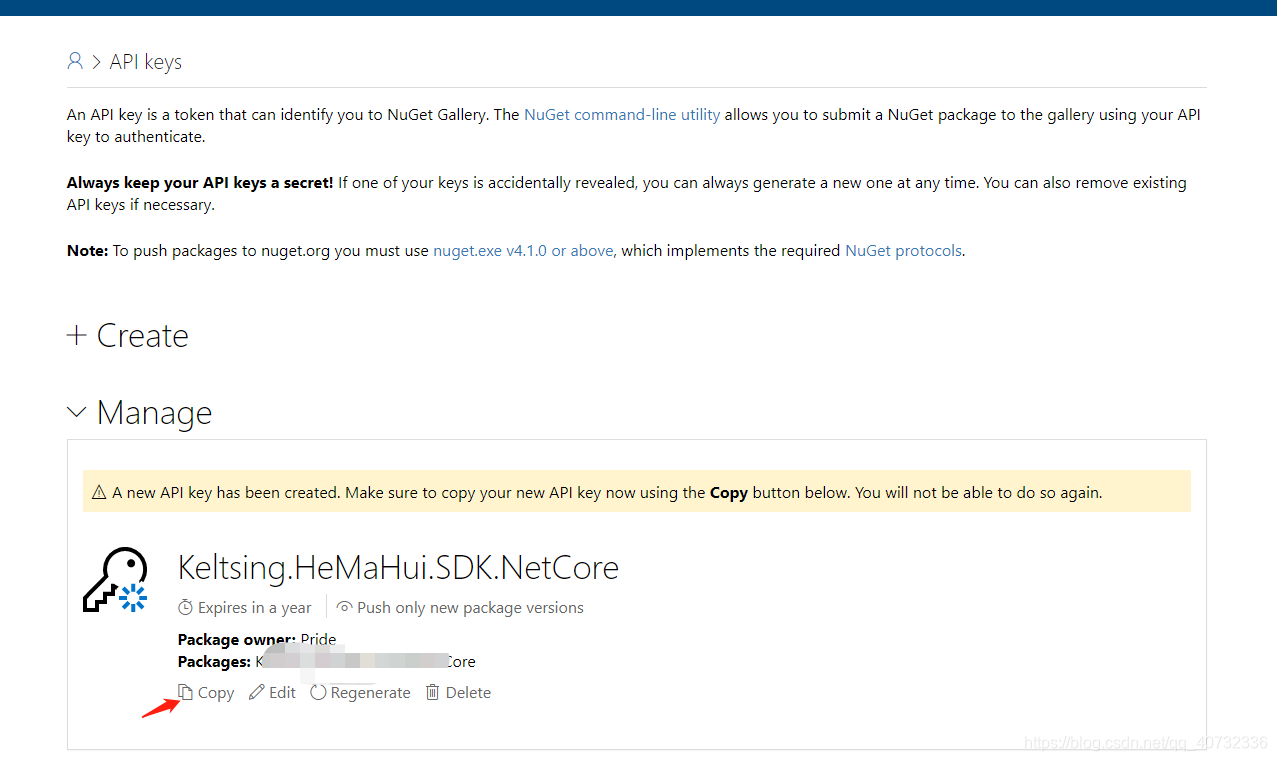
创建完成后点击copy,保存起来。因为以后无法再次复制密钥!!!
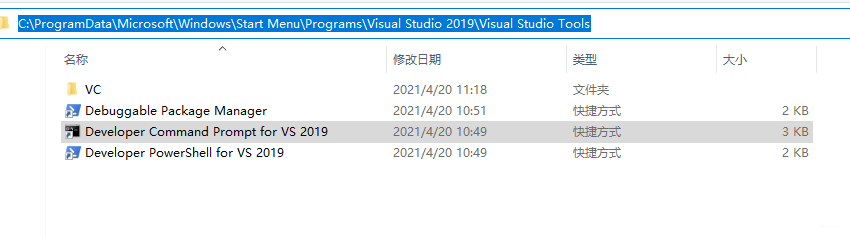
5.找到vs对应的开发人员命令提示
C:\ProgramData\Microsoft\Windows\Start Menu\Programs\Visual Studio 2019\Visual Studio Tools

6.命令提示定位到Nuget.exe所在的目录
双击运行 Developer Command Prompt for VS 2019 cd到类库的目录

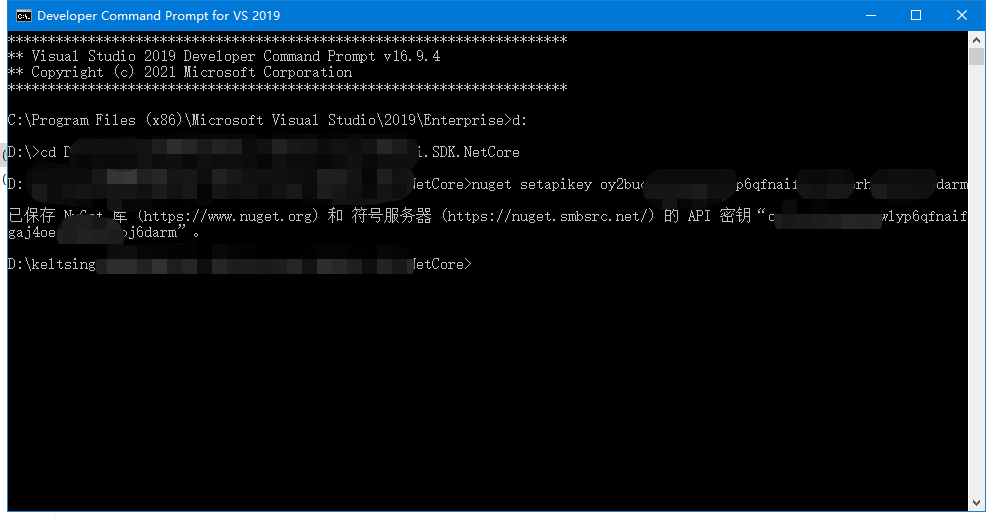
7.通过命令 nuget setapikey xxxxx (第4步生成的key), 设置API Key
通过命令 nuget setapikey xxxxx-xxxx-xxx-xxxx-xxxx-xxxx , 设置API Key;
8.项目属性

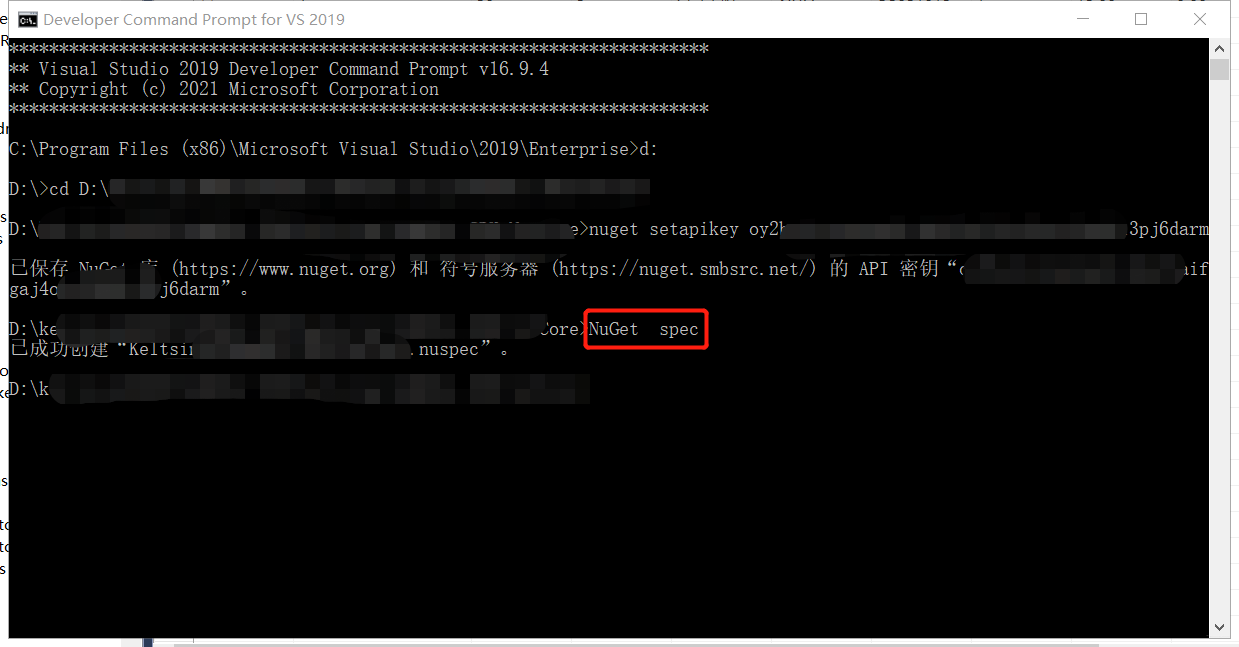
9. 生成xxxx.nuspec文件
nuspec是NuGet将项目打包成nupkg的输入文件,可以通过nuget spec命令产生。
通过命令 nuget spec 生成xxxx.nuspec文件;
10.编辑发布文件
用记事本打开NugetTest.nuspec文件
注意里面的xxx宏,这些就是引用了AssemblyInfo.cs中的设置值,在编译产生package的时候,会使用AssemblyInfo.cs中的相应值进行替换。完成编辑后,我们的nuspec文件如下:

11.生成 xxxx.nupkg文件
通过命令 NuGet pack xxxxxx.csproj 生成xxxx.nupkg文件

12.NuGet发布到服务器
通过命令 nuget.exe push xxxxx.nupkg -Source https://www.nuget.org ,将NuGet发布到服务器。

13.使用

参考文档:https://docs.microsoft.com/zh-cn/nuget/quickstart/create-and-publish-a-package-using-the-dotnet-cli
翻译:https://www.cnblogs.com/chuankang/p/10076082.html
| 
 发表于 2021-5-7 13:32


 写过类库没有发布过,学习了
